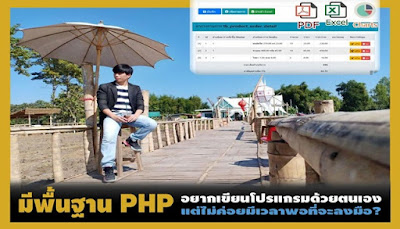
Laravel · Scheduled Tasks · Dashboard
Scheduler List: Web Dashboard
สำหรับจัดการ Laravel Scheduled Tasks
สร้าง Dashboard ดู Cron Jobs ทั้งหมดของโปรเจกต์ Laravel ผ่านหน้าเว็บ แบบไม่ต้อง SSH เข้า Server ทุกครั้ง
LaravelScheduled TasksCron JobPHPWeb Dashboard
①
ปัญหาคลาสสิกของ Cron Jobs
ใครที่เคยทำงาน Backend มาสักระยะ คงเคยเจอคำถามนี้จากทีมหรือลูกค้า: "Cron Job มันรันอยู่ไหม? ทำอะไรไปบ้าง?" — แล้วคุณก็ต้อง SSH เข้า Server ไปดู log หรือพิมพ์คำสั่ง crontab -l ซึ่งไม่ใช่วิธีที่สะดวกเลย โดยเฉพาะถ้าทีมมีคนที่ไม่ถนัด Command Line
บทความนี้จะพาคุณสร้าง Scheduler List Dashboard — หน้าเว็บที่แสดงรายการ Scheduled Tasks ทั้งหมดของ Laravel พร้อม Schedule Expression, สถานะ, และประวัติการรัน โดยใช้ฟีเจอร์ที่มีอยู่ใน Laravel อยู่แล้ว ไม่ต้องลง Package เพิ่ม
💡 เหมาะสำหรับ: ผู้ที่เริ่มต้นกับ Laravel และต้องการเข้าใจ Task Scheduling รวมถึงทีมที่ต้องการ Visibility ของ Background Jobs โดยไม่ต้องเปิด Terminal
②Laravel Task Scheduling คืออะไร?
Laravel มี Built-in Task Scheduler ที่ให้คุณนิยาม Scheduled Jobs ทั้งหมดใน โค้ด PHP แทนการเขียน Cron หลาย ๆ บรรทัดใน Server — ทำให้ Version Control ได้, อ่านง่าย, และ Deploy พร้อมกับโค้ดเลย
สิ่งที่ต้องมีใน Server มีเพียงบรรทัดเดียวใน Crontab:
# Server Cron - รันทุกนาที แค่บรรทัดเดียว
* * * * * cd /var/www/html && php artisan schedule:run >> /dev/null 2>&1
แล้ว Laravel จะจัดการ Tasks ที่ถึงเวลาแต่ละตัวให้เอง งานทั้งหมดนิยามใน app/Console/Kernel.php (Laravel 10 ลงไป) หรือใช้ Schedule Facade ใน routes/console.php (Laravel 11+)
protected function schedule(Schedule $schedule): void
{
// รายงานยอดขายทุกวันเที่ยงคืน
$schedule->command('report:daily-sales')
->dailyAt('00:00')
->withoutOverlapping();
// ลบ Log เก่ากว่า 30 วัน ทุกอาทิตย์
$schedule->command('logs:cleanup')
->weekly()
->sundays()
->at('02:00');
// ส่ง Email สรุปทุก 6 ชั่วโมง
$schedule->command('email:summary')
->everySixHours();
// Sync ข้อมูลกับ API ภายนอก ทุก 15 นาที
$schedule->call(function() {
ExternalApiSync::run();
})->everyFifteenMinutes();
}
③Frequency Methods ที่ใช้บ่อย
Laravel มี Helper Methods สำหรับกำหนดความถี่ในการรัน Task ให้ใช้ได้เลยโดยไม่ต้องจำ Cron Syntax:
| Method | Cron Expression | ความหมาย | Use Case |
|---|
->everyMinute() | * * * * * | ทุกนาที | Health Check |
->everyFifteenMinutes() | */15 * * * * | ทุก 15 นาที | API Sync |
->hourly() | 0 * * * * | ทุกชั่วโมง | Cache Refresh |
->dailyAt('08:00') | 0 8 * * * | ทุกวัน เวลาที่กำหนด | รายงานประจำวัน |
->weekly() | 0 0 * * 0 | ทุกอาทิตย์ | Cleanup |
->monthly() | 0 0 1 * * | ทุกเดือน | Invoice |
->cron('30 9 * * 1-5') | Custom | วันทำการ 09:30 น. | Custom Schedule |
④สร้าง Scheduler List Dashboard
เราจะสร้าง Route + Controller + Blade View เพื่อดึง Scheduled Tasks ออกมาแสดงบนหน้าเว็บ Laravel มี app('Illuminate\Console\Scheduling\Schedule') ที่ให้ดึงรายการ Events ออกมาได้เลย
Step 1: สร้าง Controller
<?php
namespace App\Http\Controllers;
use Illuminate\Console\Scheduling\Schedule;
use Illuminate\Http\Request;
use Carbon\Carbon;
class SchedulerController extends Controller
{
public function index(Schedule $schedule)
{
$events = collect($schedule->events())
->map(function($event) {
return [
'command' => str_replace('\'artisan\' ', '', $event->command),
'expression' => $event->expression,
'description'=> $event->description ?? '-',
'timezone' => $event->timezone ?? config('app.timezone'),
'without_overlapping' => $event->withoutOverlapping,
'run_in_background' => $event->runInBackground,
'next_run' => $event->nextRunDate(Carbon::now(), 0, false, true),
];
});
return view('scheduler.index', compact('events'));
}
}
Step 2: เพิ่ม Route
use App\Http\Controllers\SchedulerController;
// ป้องกันด้วย Middleware auth ก่อน Deploy จริง
Route::middleware(['auth'])->group(function() {
Route::get('/admin/scheduler', [SchedulerController::class, 'index'])
->name('scheduler.index');
});
Step 3: สร้าง Blade View
@extends('layouts.app')
@section('content')
<div class="container mx-auto py-8 px-4">
<div class="flex items-center justify-between mb-6">
<h1 class="text-2xl font-bold text-gray-800">
📅 Scheduled Tasks
</h1>
<span class="text-sm text-gray-500">
ทั้งหมด {{ $events->count() }} Tasks
</span>
</div>
<div class="overflow-x-auto rounded-xl shadow">
<table class="w-full bg-white text-sm">
<thead class="bg-indigo-50 text-indigo-900">
<tr>
<th class="px-5 py-3 text-left">Command</th>
<th class="px-5 py-3 text-left">Expression</th>
<th class="px-5 py-3 text-left">Next Run</th>
<th class="px-5 py-3 text-left">Options</th>
</tr>
</thead>
<tbody class="divide-y divide-gray-100">
@forelse($events as $event)
<tr class="hover:bg-gray-50">
<td class="px-5 py-4">
<code class="bg-indigo-50 text-indigo-700 px-2 py-1 rounded text-xs">
{{ $event['command'] }}
</code>
@if($event['description'] !== '-')
<p class="text-gray-500 mt-1 text-xs">{{ $event['description'] }}</p>
@endif
</td>
<td class="px-5 py-4 font-mono text-xs text-gray-600">
{{ $event['expression'] }}
</td>
<td class="px-5 py-4 text-gray-700">
{{ $event['next_run'] }}
</td>
<td class="px-5 py-4">
@if($event['without_overlapping'])
<span class="bg-green-100 text-green-700 text-xs px-2 py-0.5 rounded-full mr-1">
no-overlap
</span>
@endif
@if($event['run_in_background'])
<span class="bg-blue-100 text-blue-700 text-xs px-2 py-0.5 rounded-full">
background
</span>
@endif
</td>
</tr>
@empty
<tr>
<td colspan="4" class="px-5 py-8 text-center text-gray-400">
ยังไม่มี Scheduled Tasks
</td>
</tr>
@endforelse
</tbody>
</table>
</div>
</div>
@endsection
⑤เพิ่ม Description และ Security
ก่อน Deploy จริง ต้องทำ 2 อย่างนี้เสมอ:
เพิ่ม Description ให้แต่ละ Task
$schedule->command('report:daily-sales')
->dailyAt('00:00')
->withoutOverlapping()
->description('สร้างรายงานยอดขายประจำวัน ส่ง Email Admin') // ✅
->appendOutputTo(storage_path('logs/daily-sales.log'));
$schedule->command('logs:cleanup')
->weekly()->sundays()->at('02:00')
->description('ลบ Log ไฟล์เก่ากว่า 30 วัน'); // ✅
ป้องกันด้วย Middleware
// วิธีที่ 1: ใช้ Auth Middleware (แนะนำ)
Route::middleware(['auth', 'can:view-admin'])
->get('/admin/scheduler', [SchedulerController::class, 'index']);
// วิธีที่ 2: จำกัด IP (สำหรับ Internal Tools)
Route::middleware(['auth'])
->get('/admin/scheduler', function() {
if (!in_array(request()->ip(), explode(',', env('ADMIN_IPS')))) {
abort(403);
}
return app(SchedulerController::class)->index(app(Schedule::class));
});
⚠️ สำคัญมาก: หน้า Scheduler Dashboard ควรอยู่หลัง Authentication เสมอ เพราะแสดงข้อมูล Internal Tasks ของระบบ อย่าเปิด Public โดยเด็ดขาด
⑥คำสั่งที่ควรรู้จัก
Laravel มี Artisan Commands สำหรับจัดการ Scheduler โดยเฉพาะ ใช้ได้ตั้งแต่ Development จนถึง Production:
# ดูรายการ Scheduled Tasks ทั้งหมด (แบบ CLI)
php artisan schedule:list
# รัน Scheduler ทันที (ทดสอบ)
php artisan schedule:run
# รัน Scheduler แบบ Loop ทุกนาที (สำหรับ Local Dev)
php artisan schedule:work
# รัน Task เฉพาะตัว โดยไม่รอ Schedule
php artisan schedule:run --task="report:daily-sales"
# ดู Log ของ Scheduler
tail -f storage/logs/laravel.log
คำสั่ง php artisan schedule:list คือต้นแบบของ Dashboard ที่เราสร้าง แต่เราเปลี่ยนจาก Terminal Output มาเป็นหน้าเว็บที่ทีมทุกคนเข้าดูได้แทน
⑦สรุป: ทำไม Scheduler Dashboard ถึงสำคัญ
การมี Web Dashboard สำหรับ Scheduled Tasks ช่วยให้ทีมพัฒนาและ Operations เห็นภาพรวมของ Background Jobs ทั้งหมดได้ทันที โดยไม่ต้องให้ทุกคนมีสิทธิ์ SSH เข้า Production Server
| สิ่งที่ได้ | ประโยชน์ |
|---|
| ดู Tasks ทั้งหมดบนเว็บ | ไม่ต้อง SSH เข้า Server |
| แสดง Cron Expression | ทีม Non-tech เข้าใจ Schedule ได้ |
| แสดง Next Run Time | วางแผน Maintenance ได้ถูกต้อง |
| ป้องกันด้วย Auth | ปลอดภัย เฉพาะ Admin เท่านั้น |
| Code อยู่ใน Codebase | Version Control ได้, Deploy พร้อมกัน |
ขั้นต่อไปที่ทำได้คือ เพิ่ม Audit Log บันทึกว่า Task รันสำเร็จหรือไม่, เพิ่มปุ่ม "Run Now" สำหรับ Admin, หรือแม้แต่ต่อ Webhook ส่ง Notification ไปที่ LINE/Slack เมื่อ Task ล้มเหลว
📖 อ่านบทความ PHP / Laravel เพิ่มเติม
บทความใหม่ทุกสัปดาห์เกี่ยวกับ PHP, Laravel, CodeIgniter 4 และ Web Development สำหรับนักพัฒนาไทย
ไปที่ PHP Code Mania →